Deploying to Azure App Service from Azure Portal
Last updated: June 13, 2025
Sometimes, you may need to deploy using Web Deploy - such as if the Kudu site is down or if your company prefers Web Deploy. This demo will walk you through deploying via Web Deploy.
To deploy the eShopOnWeb sample to an Azure App Service, starting in the Azure Portal, follow these step-by-step instructions (or, deploy to Azure directly from from Visual Studio):
Create and Configure the Azure Web App
-
Clone or download the eShopOnWeb sample to a folder on your local machine.
-
Log in to the Azure Portal with your Microsoft Account.
-
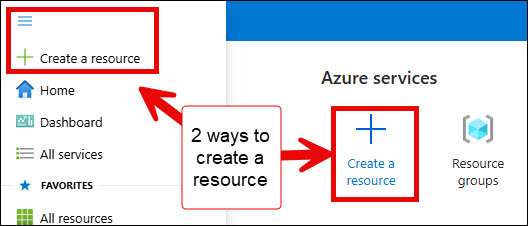
Select the “+ Create resource” either for the portal home page or under the hamburger menu (≡).
-
Select
Web App.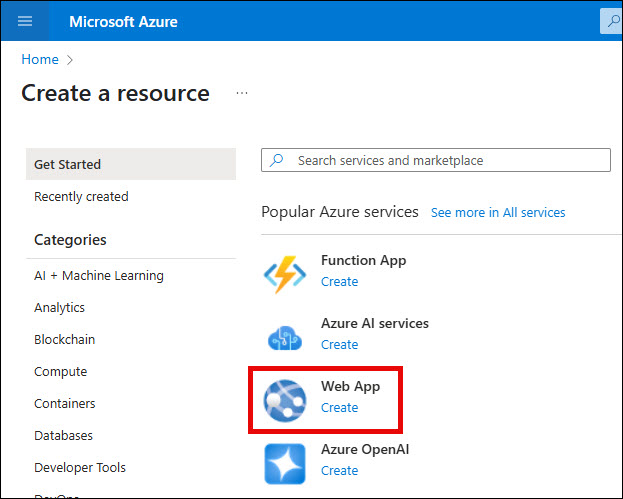
-
On the Create Web App screen, in the Project Details section, choose a subscription. Then choose a new resource group name or select an existing one, then select Review + create.
For the Instance Details, enter a name for the web app. Select Publish as Code. Select
.NET 9for the Runtime stack. Then, selectWindowsfor the Operating System. Select an appropriate Region.In Pricing plans, select an appropriate pricing plan.
Then, select Review + Create. Then, select Create.
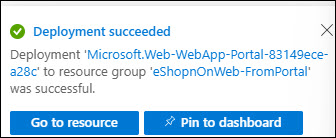
In a few moments you should see that the deployment was successful.
Download Publish Profile
-
Once the deployment succeeds, go to the new web app.
-
Select
Download publish profile.
Note: This may complain that you cannot download the file because basic authentication is disabled. Under Settings > Configuration > General Settings, you may need to turn
Onfor both SCM Basic Auth Publishing Credentials and FTP Basic Auth Publishing Credentials. If you change these settings, then Restart the web app before trying to download the publish profile. Learn more about disabling Basic Authentication. -
Copy the downloaded
.PublishSettingsfile to theeShopOnWeb/src/Webfolder.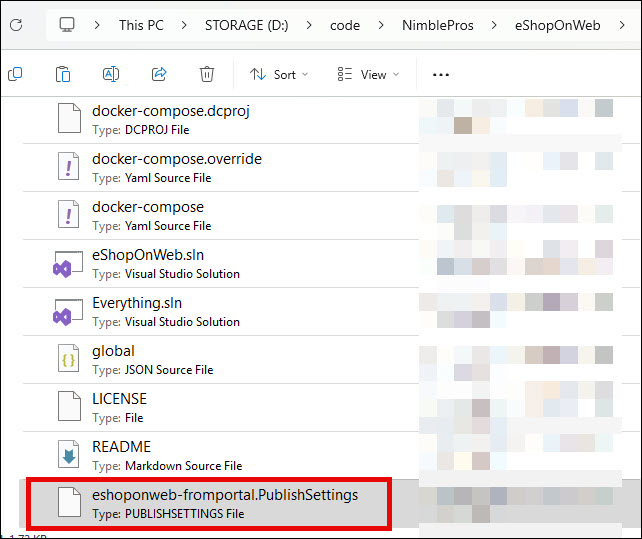
-
Open the
eShopOnWeb.slnsolution file. -
Right-click on the
Webproject and selectPublish.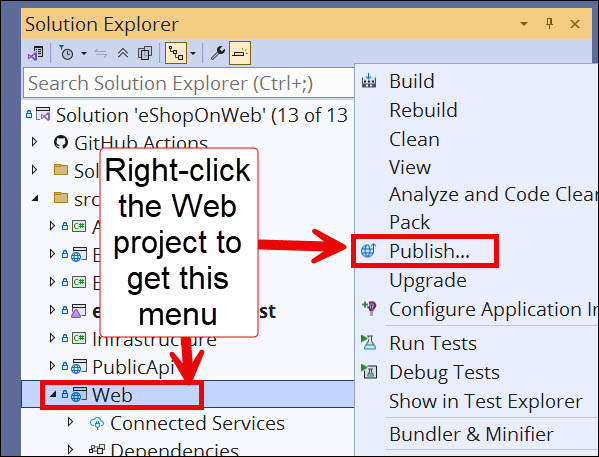
-
Select
+ New profile. In the Publish dialog, on the Target step, selectImport Profile. Select Next.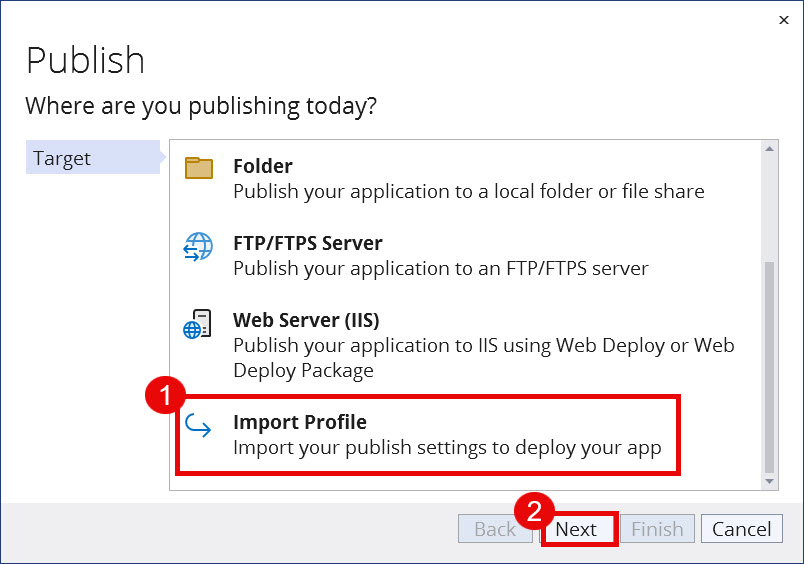
-
Select the
.PublishSettingsfile you saved in theeShopOnWeb/src/Webfolder. -
Make sure the
fromportalpublish profile is selected. Then, ClickPublish.You should see files being copied. When the publish process completes, the site should open in your browser.
Update Azure App Settings’ Environment Variables
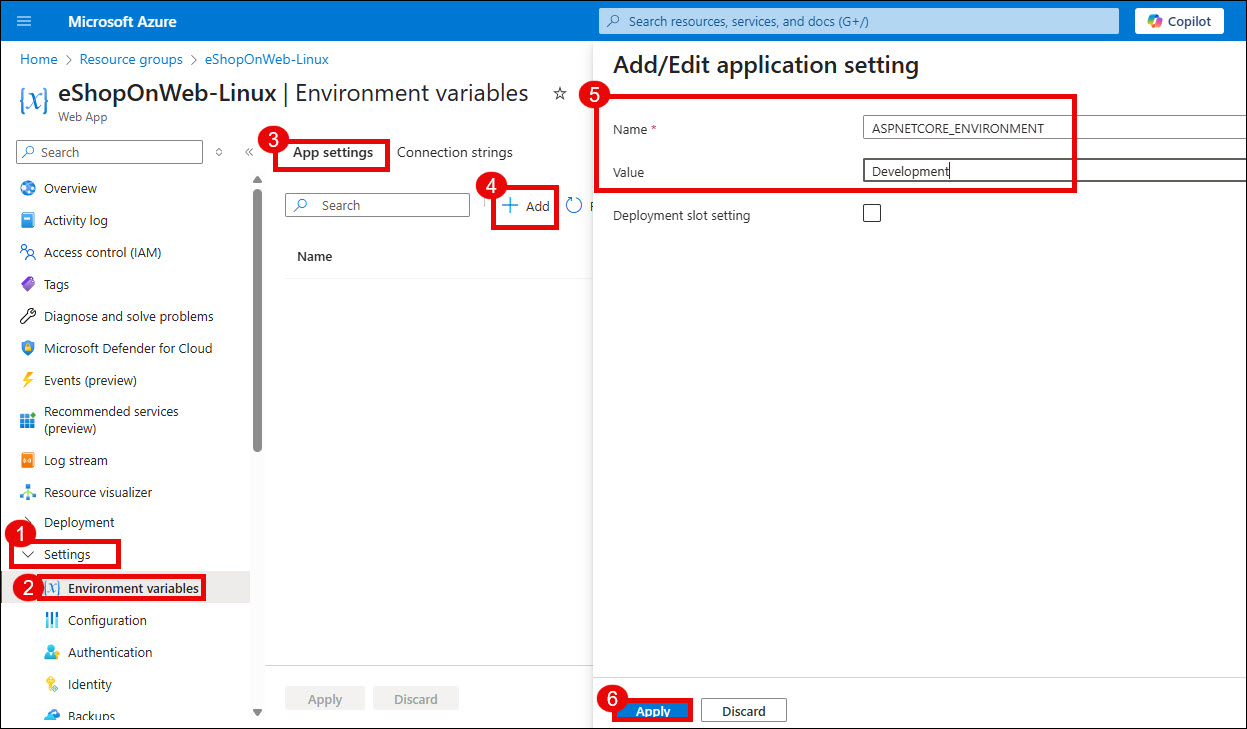
In order to populate the seed data, we need to set the ASPNETCORE_ENVIRONMENT variable to Development. (Note: This is not the same as Debug vs. Release configuration). The sample data is only seeded in the Development environment. This is only needed if you are working in development. You can configure the App Service to run in Development as follows:
-
In the Azure Portal, navigate to your Web App.
-
Select Settings > Environment Variables.
-
In the App settings section, add a new key
ASPNETCORE_ENVIRONMENTwith valueDevelopment. -
Select Apply.
-
Add another key for
UseOnlyInMemoryDatabasewith the value oftrue. -
Select Apply.
-
Finally, select Apply to apply all of these changes to the App Service.
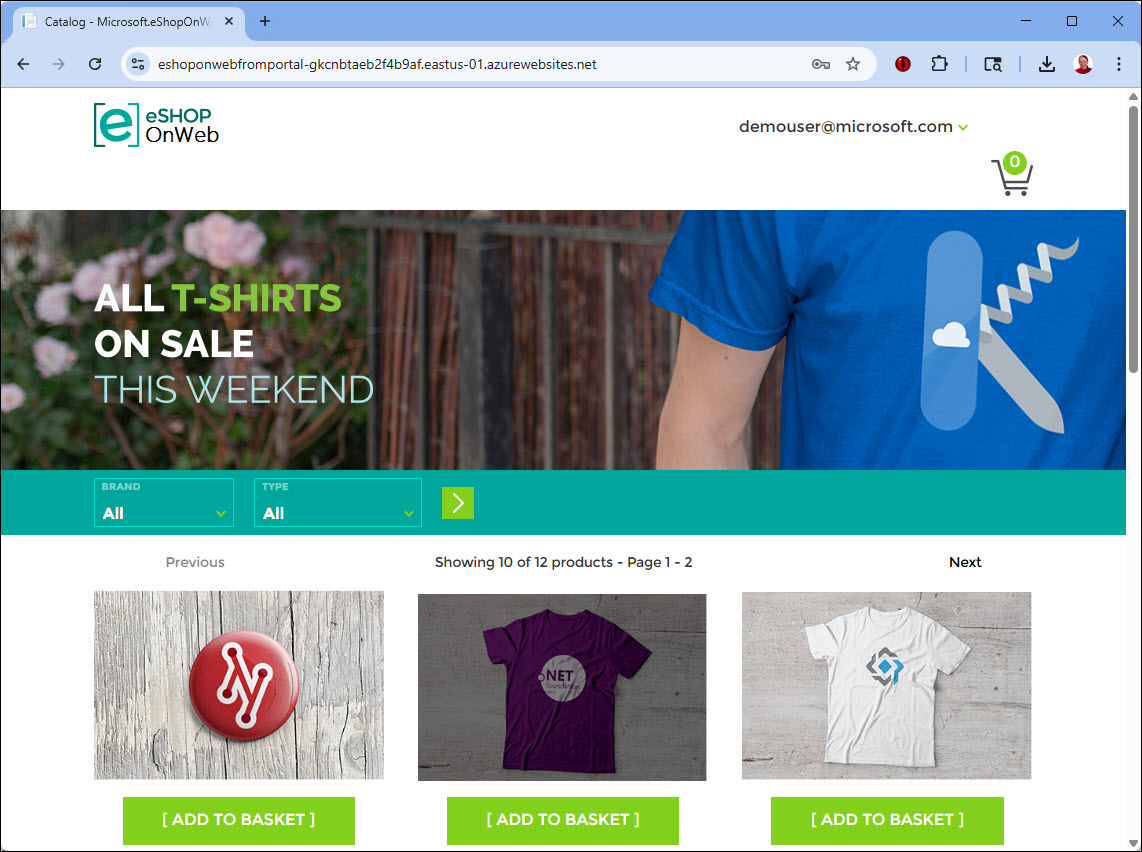
At this point, you should be able to refresh the site and see it loaded with data (if not, publish once more from Visual Studio).
Learn more about Azure deployment options in the official documentation.